 |
|
|
|
|
|
|
|
|
ESTIMATED COST OF WING ASSEMBLY: $6000
TOTAL for EACH wing including everything -This is based on
what was spent over the period of time I was building the wings, it is
an educated guess and seems about right. I did have access to a milling
machine and a lathe to manufacture some of the parts.
MODIFICATIONS: See
Chapter #11
NOTES ON PLANS: There were
no real errors with regards to skinning the wings
NOTES ON ASSEMBLY: After the basic
wing was built each wing was skinned during its own five day flurry of
activity.
In preparation,
the plywood was actively saturated with water to get its moisture content
a few percentage points higher that the measured content of the other "control"
plywood that had been around my shop soaking up ambient moisture for a
few years. The content was measured with a wood moisture meter.
I would recommend to anyone building wings that they buy their plywood
way in advance and let it moisture soak for a few years. The stuff
comes from the warehouse with about a 6% moisture content. Ideal
would be about 12%. Here at the coast I took mine up to 18% before
skinning
After soaking, the
skins were first dry-fit into place on both sides, ribs marked with a pencil
and I drilled 3/16th holes in a few spots to place locating dowels to insure
that the skin would later seat where it was intended. The plywood
was scarfed at the overlaps and the wing ribs at the overlap had 1/2" blocks
glued to each side of them to give the scarf joint a 1 1/4" underlying
surface to support it.
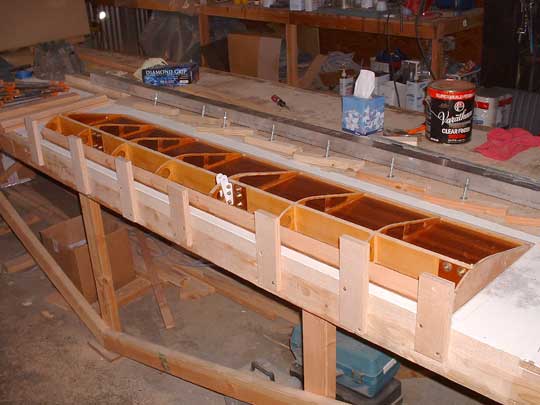
The wing was then
placed on the table upside down and the spars supported every two feet
with careful placement of wood blocks, shimmed to level everything,
These were temporarily hot glued into place. A water level was used
to level the spars at the ends and in the middle. It is also important
to mention that the hardware and wiring was ready to install and well planned
out, but not installed before starting the skinning process.
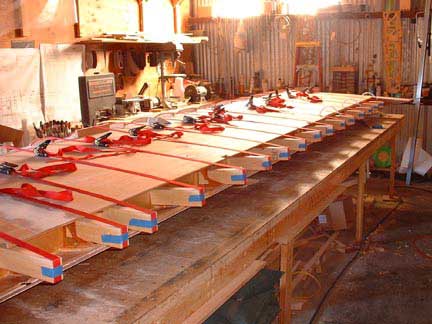
Skinning Day 1:
First the skins at the inboard and outboard ends were glued on. To
spread the glue I initially used the T-88 two part gun to do the skinnier
surfaces and brushed my favorite West System mix over the spars and wider
surfaces. I eventually gave up the T-88 system as it was messy,
and I felt that the mixing tubes were leaving too many small areas that
were not mixed well causing them to take a long time to fully cure.
In its place Jim Belknap suggested that I take an ordinary Caulk gun tube,
empty it out, and put my thickened West system glue in it for dispensing.
This proved to be a much better method as it went faster, I knew that the
glue was properly mixed as it was thoroughly stirred and mixed with filler
before being put in the caulk gun. Best of all I was using my favorite,
and familiar epoxy.
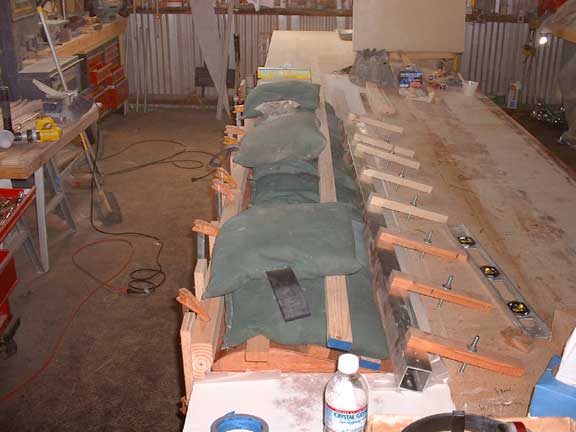
After plenty of Glue
was in place I would have someone help me flip the plywood over and carefully
place it on the alignment dowels. I would then place 1/4" battens
across the wood spanwise to help distribute the weight evenly. On
top of those I placed an electric blanket to help the cure progress at
a controlled rate. This helped immensely as I was working at the
coast where it was approximately 60 degrees Fahrenheit. On top of
the blanket I would place some plastic sheeting. Finally on top of
the plastic, I would place swimming pool cover weights filled with water,
and in some cases some sand bags. After the weight was on and looking
evenly distributed, I would use clamps to clamp down the leading and trailing
edge of the plywood using the wing spar 2"square tubing as a straight edge
to keep the edges true.
It would take about
four hours for the glue to cure hard, at which time I would clean up the
scarf areas and then do the center panel of plywood in the same manner.
This allowed me to skin one side of one wing in a day. I wanted to
keep the time between skinning the top and bottom skins to a minimum to
reduce any asymmetrical changes in plywood moisture content.
Skinning Day 2:
The next day I would cut all of the inspection holes in the bottom skins
and glue in the plates that would be used to back up the inspection plates
once the wing was complete. In addition to this I would mask off
all of the upper spruce surfaces for spraying with varnish.
Skinning Day 3:
I would basically spend the day varnishing the inside of the wing.
For the most part this was done with two liberal spray coats and a single
brush coat on the hard to reach areas like the inside of the ribs lightening
holes.
Skinning Day 4:
This was a long day of installing all of the hardware, wire, cables, antennas
and the foam floatation in the wing tips. Everything was installed
using proper hardware, bolts dipped before inserting unless they were subject
to removal. The wiring had to go in for Strobes, Fuel Pump, Pitot
heat, Landing lights, NAV light, antennas, and the feedback pot for the
flap actuator. In addition, Plumbing was installed for the Pitot
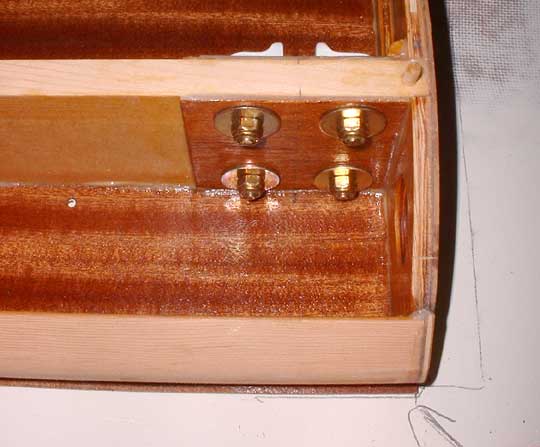
tube and fuel lines. Hard parts included Float attach fittings, the
strut and spar attach fittings, Flap actuator hangers and bearings.
This was usually about a 15 hour day after getting everything installed,
and having my local A&P take a good look at what I had done.
The inspection holes will allow me to work on the guts down the road but
it is MUCH easier to just get it right this time around. At the end
of the day the wing was carefully positioned and leveled for the top skins.
It is extremely important to get the wings exactly true as once the top
skins are glued on any washout will be permanent.
Skinning Day 5:
The final day of my skinning flurry was done exactly like the first day
(see above) The whole process takes about 60 hours of intense work.
This does not include putting the leading edge on.

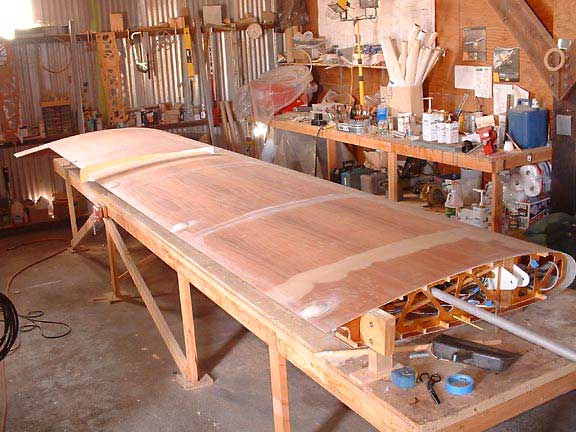
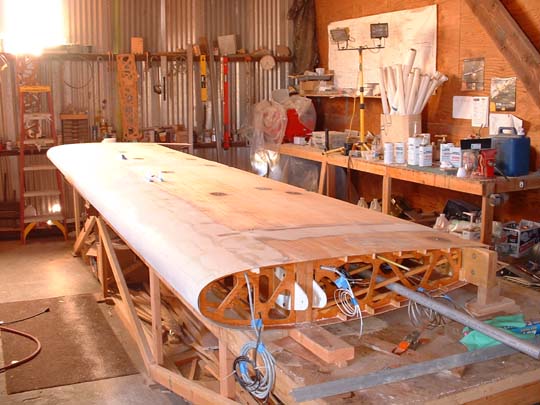
Right Hand Wing ready for
closing (composited image)
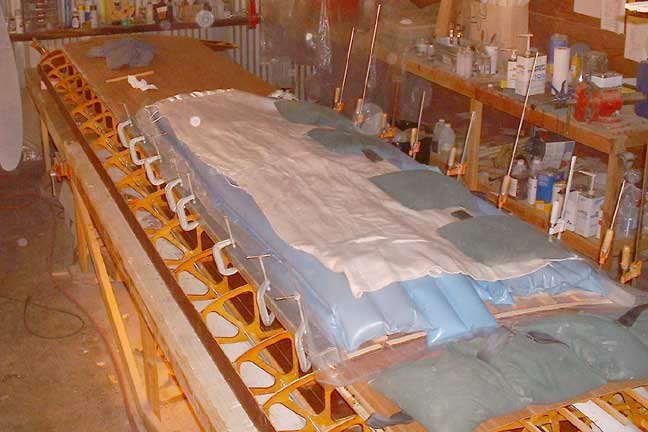
Gluing on Middle skin |
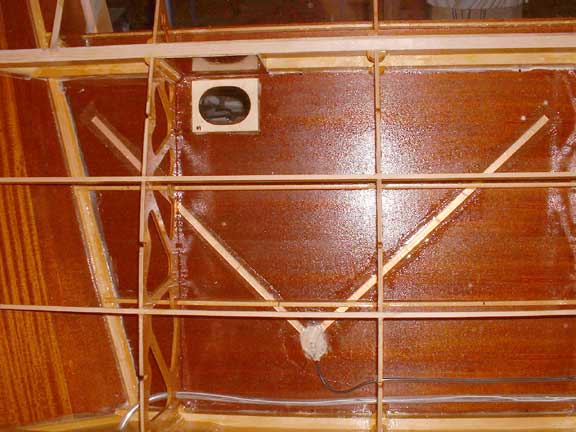
NAV Antennae |
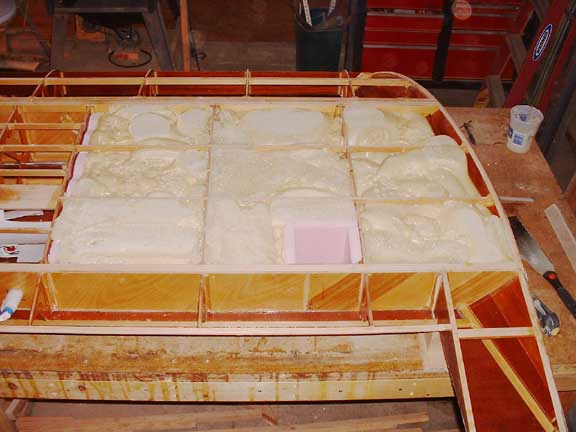
Foam Floatation in Wing tips |

Gluing on End Skin |
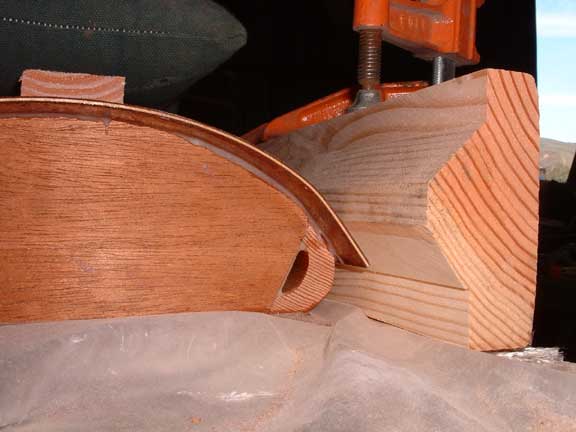
Leading Edge: Once the plywood was in place I cleaned up any unnecessary Glue squeeze out. The leading edges were glued on using ratcheting straps over each nose rib. To obtain an even clamping force I cut plywood "Cs" that were sized to provide some force on the top and bottom of the wings nose (not just the front as the straps would have done if used alone). I also placed short 2x4s at the rear spar to move the force from the straps away from the delicate plywood trailing edge.
Trailing edge 2x4s |
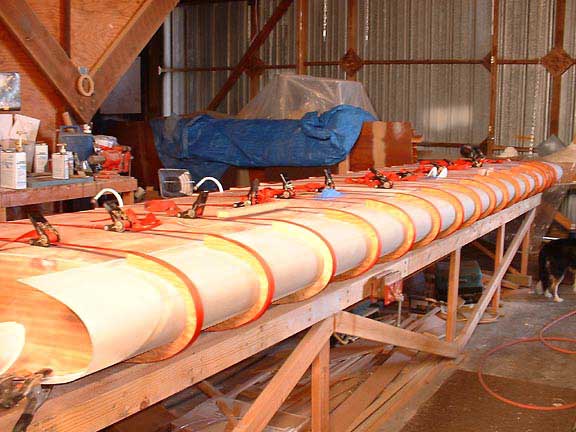
Leading edge Strapped w/ Plywood Keepers |
Final product |
Skinning the Flap and Aileron:
This was actually done before skinning the wing but I figured this was
the best place on the website to squeeze it in. The trailing edge
of wooden flying surfaces are EXTREMELY hard to keep straight. This
is because the TE spruce is usually only about 1" x1/4" thick and then
it gets two 1/16" sheets of plywood glued to either side. If either
of these two plywood sheets shrink after they are glued on it pulls the
TE into a bow.
There are a few DOs
and DONTs to try to keep in mind when trying to get a nice TE with a wooden
surface. The primary DO is to have your plywood purchased WAY ahead
of time and store it FLAT. DO get familiar with the moisture content
of plywood stored in your workspace and try to keep your skins at the higher
end of the range. DONT skin one side on a humid day and the other
on a Dry day. DO glass the outside of the flying surface soon after
the skinning is complete. When gluing DO clamp the trailing edge
down to a known flat and true surface.
In skinning my Flaps
and Ailerons I carefully controlled the moisture of the skins and then
marked off all of the rib locations on the top and bottom. The Flap
uses a two part skin so the bottom skin (which is flat) was glued together
as one piece. The top was installed as a two-part.
All skins were masked
off at the rib stations and were coated with Polyurethane.
I made a perfectly
flat and true workbench by using my wing-strut tube and drywall compound
to create an area that was perfectly true and level. This took
a couple "generations" to get right. If I were doing this with
any regularity it would be worth purchasing a large plate of 1/2"
glass to use as a true surface.
Gluing the bottom
skins on was easy as glue was applied and then weight was just evenly placed
along the length of the assembly. Because the surface was true I
ended up with a perfectly flat bottom skin.
After any hardware
was installed the top skins were glued on using a combination of weights,
and a straightedge forced down on the trailing edge (see pictures)
The skin fwd of the spar needs to bend around the ribs and then adhere
to the LE Fir piece. I did this using blocks carefully cut in a table
saw and then wedged down into place with clamps (See pics) Definitely
do a few dry runs to make sure you have things set up right before applying
glue.
I am very happy with
the straightness of my trailing edges. I don't think I could do better
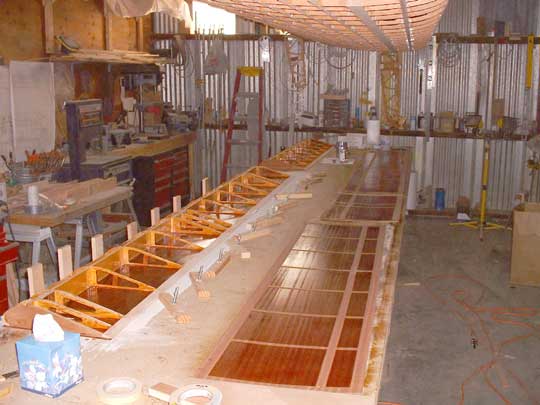
Flap and Aileron Ready for skinning |
Aileron |
Detail - Aileron - Note 1/8" dowel used to align skin |
Detail of clamping skin to Nose piece |
Clamping the Skin down |
(For those of you who would
like detailed photos of the wing just before I closed it they are posted
on Ofoto.com and can be accessed through the yahoo group. If you
can't get in shoot me an email and I'll set you up to view them.)
|
|
|
|