 |
 |
 |
|
|
|
|
| Parts and more parts | $750 |
Estimated time Spent to date: 460 Hours
MODIFICATIONS: There are
no actual plans for construction of the cabin. I have figured most
of it out as I went. I am writing this after finishing the cabin
so I have the advantage of hindsight. The cabin, as I built it, is
SO different than the stock glass piece that it would be impossible to
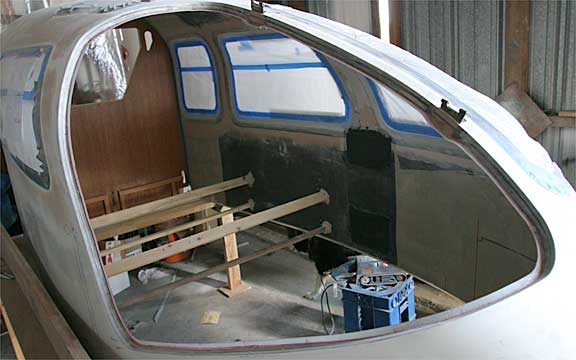
compare the two. Some of my cabins "features": I have
reinforced the T shaped bow that goes between the front windows and between
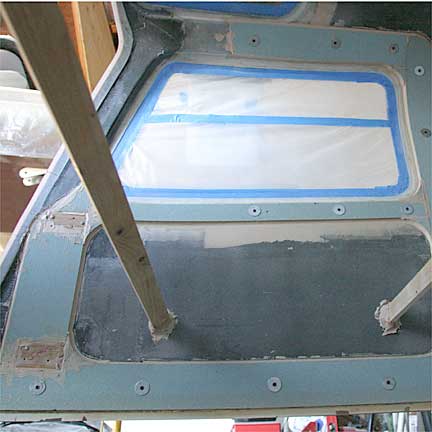
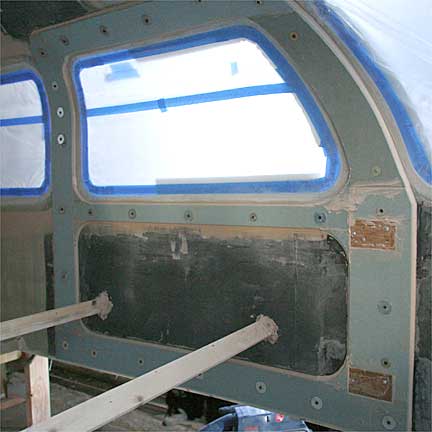
the doors with carbon fiber. I have added two "eyebrow" windows above
the pilots head for better upward visibility. I have also built a
mahogany center console along the center roof line. I intend to use
this to install all of the engine controls.
* To see how the basic foam-core shell
of the cabin was constructed please visit Chapter
#18
NOTES ON PLANS: No Plans,
No Notes!
NOTES ON ASSEMBLY:
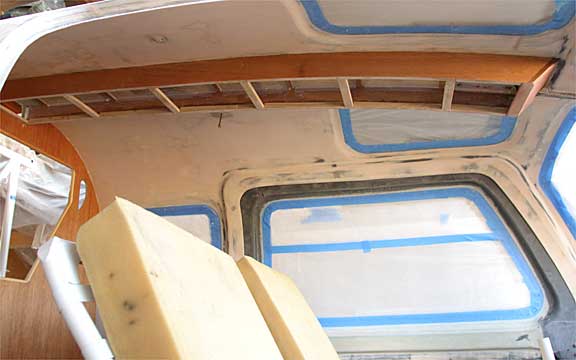
Window Installation: I wanted to keep the attachment of the windows a little flexible to allow for expansion and contraction. To do this I attached the windows to the outer fiberglass layers using a flexible silicone, then backed the windows on the inside with a fabricated fiberglass ring glued into place.
|
|
|
|
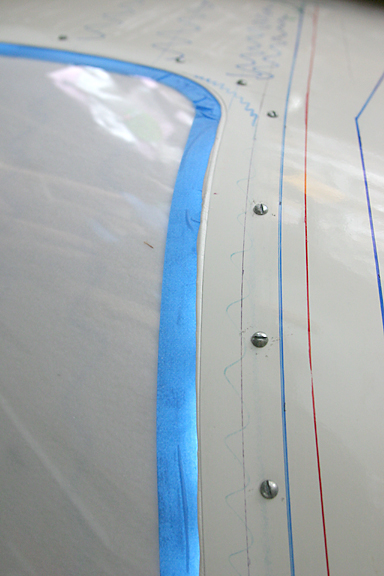
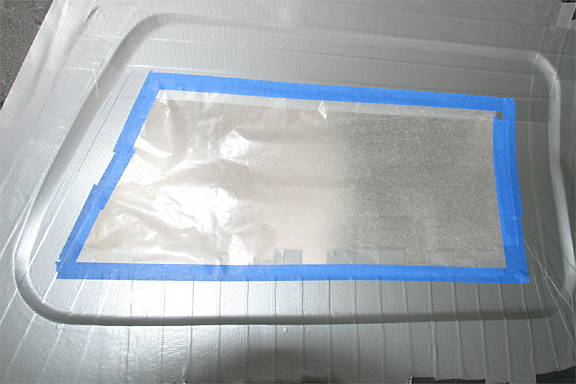
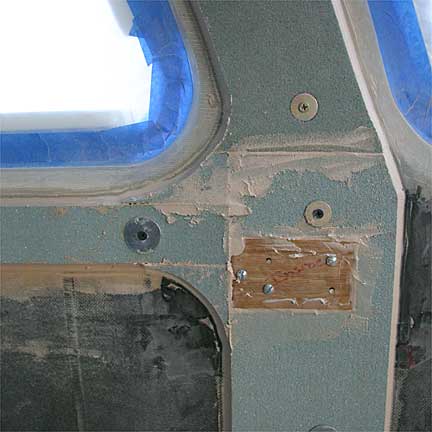
The windows were installed by cutting a hole in the cabin shell with a jigsaw. This hole was sanded to get a smooth shape. Then I used a dremel tool with a cut-off wheel to enlarge the hole ON THE INSIDE ONLY about 1" to 1 1/4" all the way around. I cut the foam core with a matte knife and then removed the excess glass, carbon, and foam from the inner side of the cabin. The back side of the outer glass layers were then cleaned up with some sandpaper to get the excess flox and foam off of them. Next I would drill holes through the cabin shell about 3 inches from the edge of the window, the holes were spaced about four or five inches apart around the full circumference of the window. I prepped the Plexiglas by fitting the window to the hole, masking off the clear inner part of the window that is not getting attached, and then roughing up the outer edge of the window with 80 grit sandpaper.
 |
 |
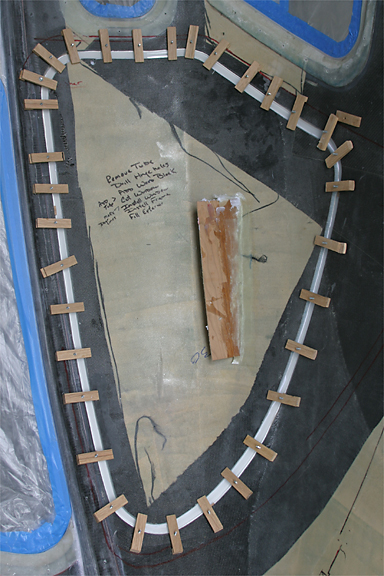 |
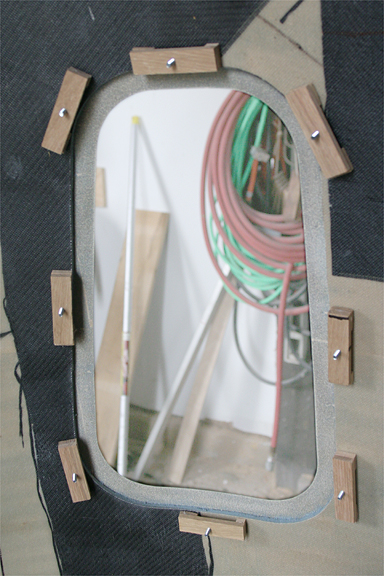
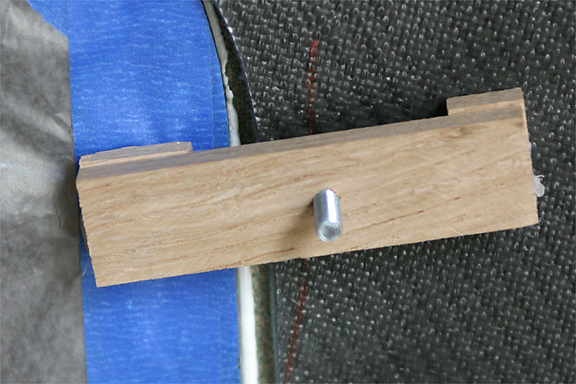
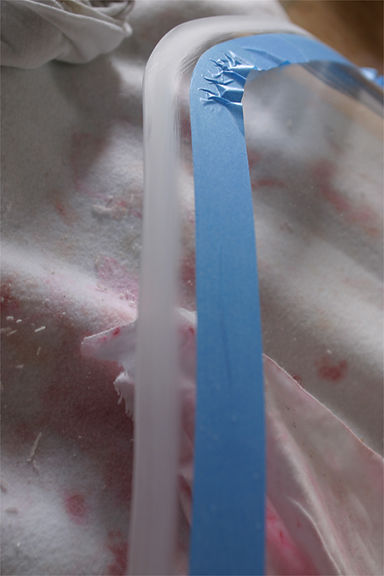
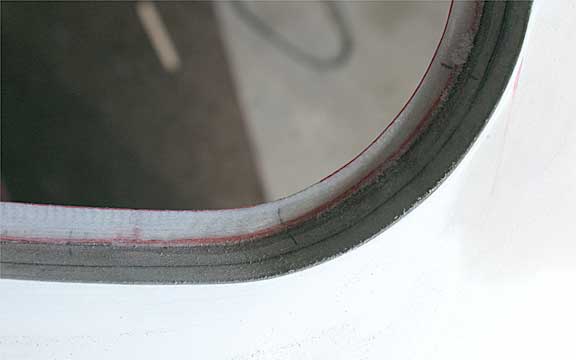
I next glued the Plexiglas into the windows using a specialized Silicone based compound named "silpruf" It is a GE product that the marine crowd, and Glasstar crowd is using to attach their windows. I would lay a bead of the Silpruf around the window and the flange and then fit the window into place. I clamped the window in using screws and special little "clamping sticks" that I made out of oak by tapping a #10-24 hole and hot gluing some smaller chunks of oak to make my "clamp". The screws were tightened down from the outside and this nicely snugged the Plexiglas to the outer fiberglass. The result was the Plexi was glued to the outer fiberglass layer with the Silpruf and the "squeeze out" on the inside provided the lateral edges of the Plexiglas with a little pillow to expand into. Then I would clean up the clear window part of the Plexiglas by wiping off the excess and then pulling off the masking tape leaving a nice line. It takes a little work and practice to get this right. I started with my smallest windows (the eyebrows) and finished with the front ones. The silpruf was allowed to set for two days before I would remove the clamping pressure. The directions said 24 hours were sufficient but it took longer. I was told that silicone needs moisture to cure, I'm on the coast so it should have cured fast. I still recommend the silpruf, I did some experiments with other silicones and they either didn't stick well, cured so fast that the clean up was impossible, or contained ingredients that would craze Acrylic. The whole process for eight windows took quite a lot of time. During my progression of windows I ended up clamping the passenger side door window down too much and I heard that ugly noise: "snap" Shit I cracked it! Fortunately I had made two of every window, there went my spare! I then started using the original chunk of cut out fiberglass shell that the windows were replacing. I would cover it with felt and use it to spread the force of the screw/clamping sticks. This did a much better job and eliminated the risk of getting a "hot spot" from too much clamping of the Plexiglas.
 |
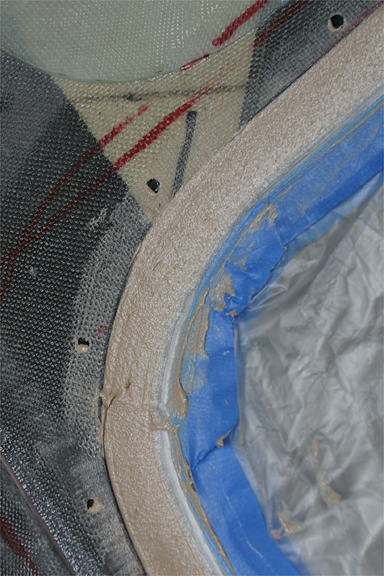 |
For the windows inner "backing rings" I started by filling around the circumfrence of the window using West 410 filler. Once that had set I would sand it to a pleasing relief. I then covered the window area with duck tape. Next I would do a lay-up of three to five layers of 6 oz glass (depending on which window we are talking about) and make a ring for the circumfrence of the window. Before removing the ring I would re-drill the holes that had previously been used to clamp the window into place. This would again be how the "ring" would get clamped on and by drilling before removing the ring I guaranteed the correct alignment. The fiberglass ring was pulled off, shaped and sanded. I would then again mask off the window and glue the pre-made ring into place using the same screw holes, screws and fender washers. The holes were later filled and sanded flush.
The whole process takes quite a bit of
time but I ended up with a clean looking installation that has some "give"
for the expansion and contraction of the Plexiglas. I do not look
forward to the prospect of having to replace any of the windows.
They are "in there"
 |
 |
 |
 |
Next the doors were cut out using a jigsaw. Use new, sharp metal blades and change them when the glass wears the teeth down. When cutting through the hinge blocks the blade was changed to a wood cut blade. The edges of the door and the opening were then sanded with a sanding block to get nice straight, square edges. On the cabin shell, I next removed the foam from in between the glass layers using a carbide dremel cutting tool. Basically the goal was to just remove a small "cove" of foam from the core. This was replaced with West Systems Filler (406) I believe this filler is comparable to Carbo-sil. Once sanded, this created a hard edge for what was becoming the door jamb. After this was finished I cleaned up and sanded the glass ring from the Pre-door-cut-out Layup. I trimmed it so that I would get approximately 1/2" of extension into the door opening. This was glued onto the inside of the door opening and completed the door jamb.
 |
 |
For the door edges I put their hinges on and positioned them as closed. Then I marked the insides of the doors where the new door jamb came to rest against the inside of the door. I then used a cut-off wheel in the dremel tool to cut off the inside glass and inner of the two layers of foam cutting an additional 1/8 to 1/4" inside of the aforementioned line. The glass, carbon and foam were removed from the inside layer (only) of the door. I then built up a cove of carbosil to replace the removed foam using a tongue depressor to get a nice radius. Afterwards, getting the door to seal nicely largely became a process of removing material from this cove or adding more to it as necessary.
Door latches (I'll update my latches in the future) As I worked to get the doors to fit nicely I started to realize that If I wanted to keep that airtight seal, I would either need to latch the door with multiple latch points, or stiffen (read thicken) the doors dramatically around the windows. I decided to go with a door latch that would anchor the door at two points. The latch combined with the two hinges and an alignment pin has the door anchored at a total of five points. I spent some time looking around for an off the shelf latch that would do the trick but ended up making my own. You don't detect a common theme here do you? So out to the drawing board and I came up with a basic cam operated latch that has a secondary Bowden cable operated pin that latches at the top of the door near the window.
Overhead console-
I decided to put in
an overhead console in to accommodate the engine controls, some ventilation
and some cabin lighting. The headroom in the Aircar is actually pretty
good. I have seats that I suspect are "taller" than the Cessna seats
that the plans call for but there are still a few inches above my head.
Some other reasons for the console are: 1) the panel has limited space
so I thought it would be wise to get some of the controls off of the panel,
2) The engine is above and behind the cabin and it seemed like the "keep
it simple" approach to the engine quadrant and basic switches would be
to keep them in a direct and straight line to the engine. 3) I also
set up the cabin roof with some "ground planes" for any future installation
of antennas.
 |
 |
Finishing -
I actually had a tough
time deciding what to do with the interior finish. In the end I decided
that the easiest approach would be Zolatone. Then I looked at the
sample book and I just couldn't bring myself to do it. I just couldn't
bear to paint my interior like it was a trunk! In the end I decided
to sand, fill, prime and finish paint all of the interior. I did
this before gluing down the cabin because It seemed like it would be a
much easier finishing job off of the hull than on it.
THINGS I WOULD DO DIFFERENTLY NEXT TIME: The cabin came out pretty light however the doors seem a touch heavy. I think a large part of this is due to using 3/16" plexi for the side windows, the multiple "fixes" for the latches and fit. I have also developed the latch mechanism in place, If I were to do it again I could easily save a few ounces here and there and probably cut a pound or two from the doors. They are however solid, fit well and latch and lock tightly.
Up next Sewing
my Upholstery
|
|
|
|